Ferman 1851: Stitching a Sultan's Berat from Phone Photos
There was no scan of the 1851 berat at the Sadberk Hanım Museum, so I took two dozen phone photos through the glass and had an agent stitch them into an 8000 × 17131 replica.
I built a small app called Ferman 1851. It shows the Ferâşet-i Şerîfe Beratı, a berat of Sultan Abdülmecid dated 11 January 1851, now in the Sadberk Hanım Museum in Istanbul. The document is on one side, the reading on the other. Hover a line and you get the Ottoman text, a transliteration and a translation.
The code is on GitHub: CahidArda/ferman-1851.
It is the third app of its kind, after Bosphore 1819 and Dikilitaş. Those two had an easy start: the map already had a good scan, and the obelisk only needed four photos. This one had neither. The berat is a long sheet of paper behind display glass, and there is no high-resolution image of it online. So the first job was to make one.
What I had
A phone. I took one photo of the whole frame, straight on, and then walked along the glass taking overlapping photos of each part, some from a step back and some up close to the lines. Two more went to the small gold invocation at the top, lit from the side so the gold would show.
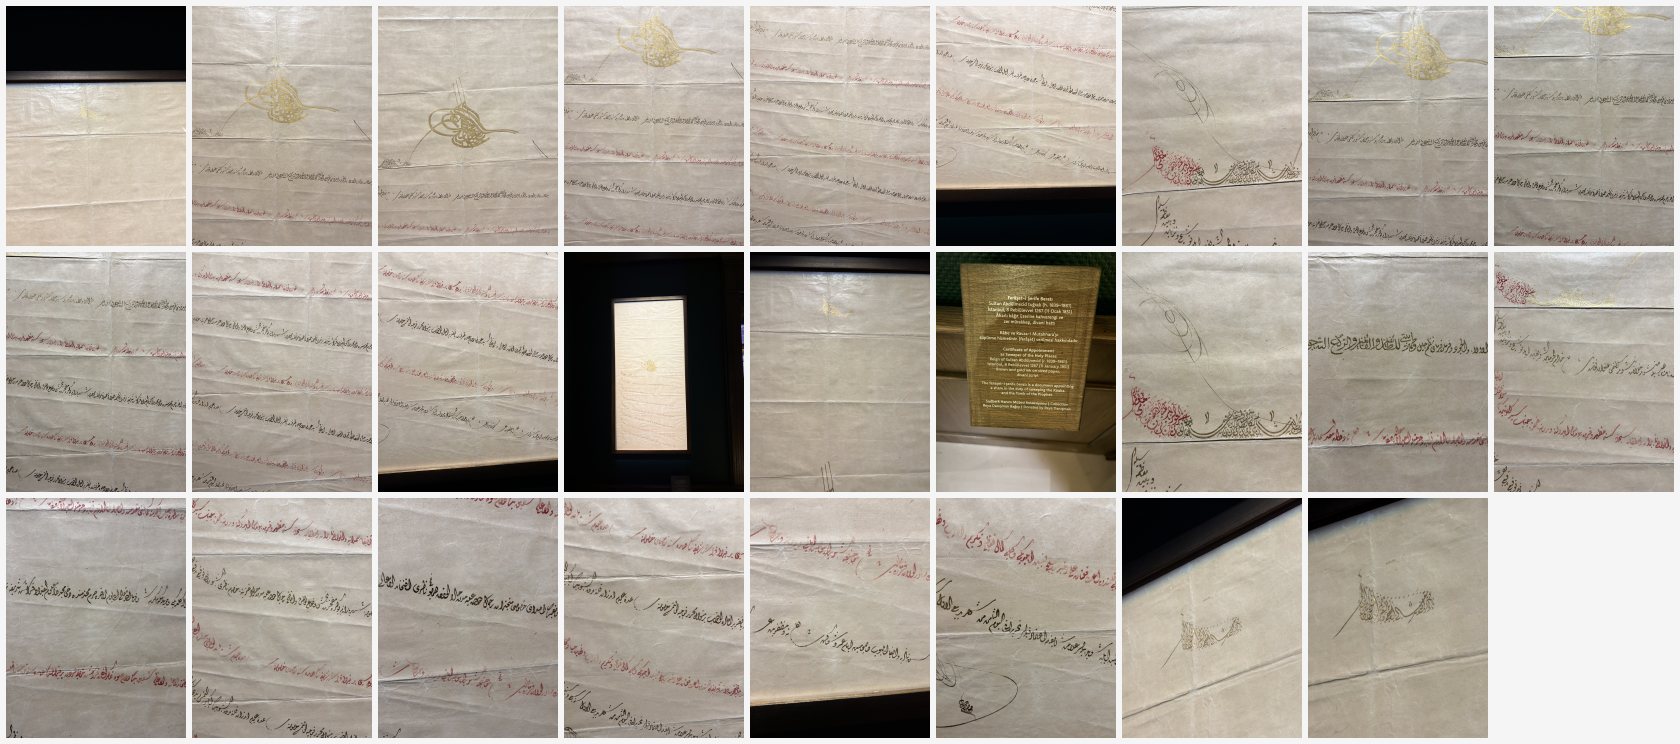
Everything I gave the agent: 23 photos of the document, the museum label, and two raking-light close-ups of the gold invocation (bottom right).
None of these is a scan. Each one is taken at a slightly different angle, with the glass in between, a lamp above and a frame casting a shadow. The paper is folded and wrinkled, so it is not even flat. What I asked for was simple to say: turn these into one straight, even image, as sharp as the closest photo wherever there is a close photo.
The agent ran in an Upstash Box, with Python and
OpenCV, and wrote the pipeline as a handful of scripts. They are all in
scripts/. Here is
what they do.
Step 1: one photo to be the frame
The straight-on photo of the whole document is the skeleton. It is the only photo that sees everything at once, so it decides where everything goes. The four corners of the paper were marked once, and the photo was warped so those corners become a rectangle. That rectangle is the canvas: 8000 pixels wide, 17131 tall.
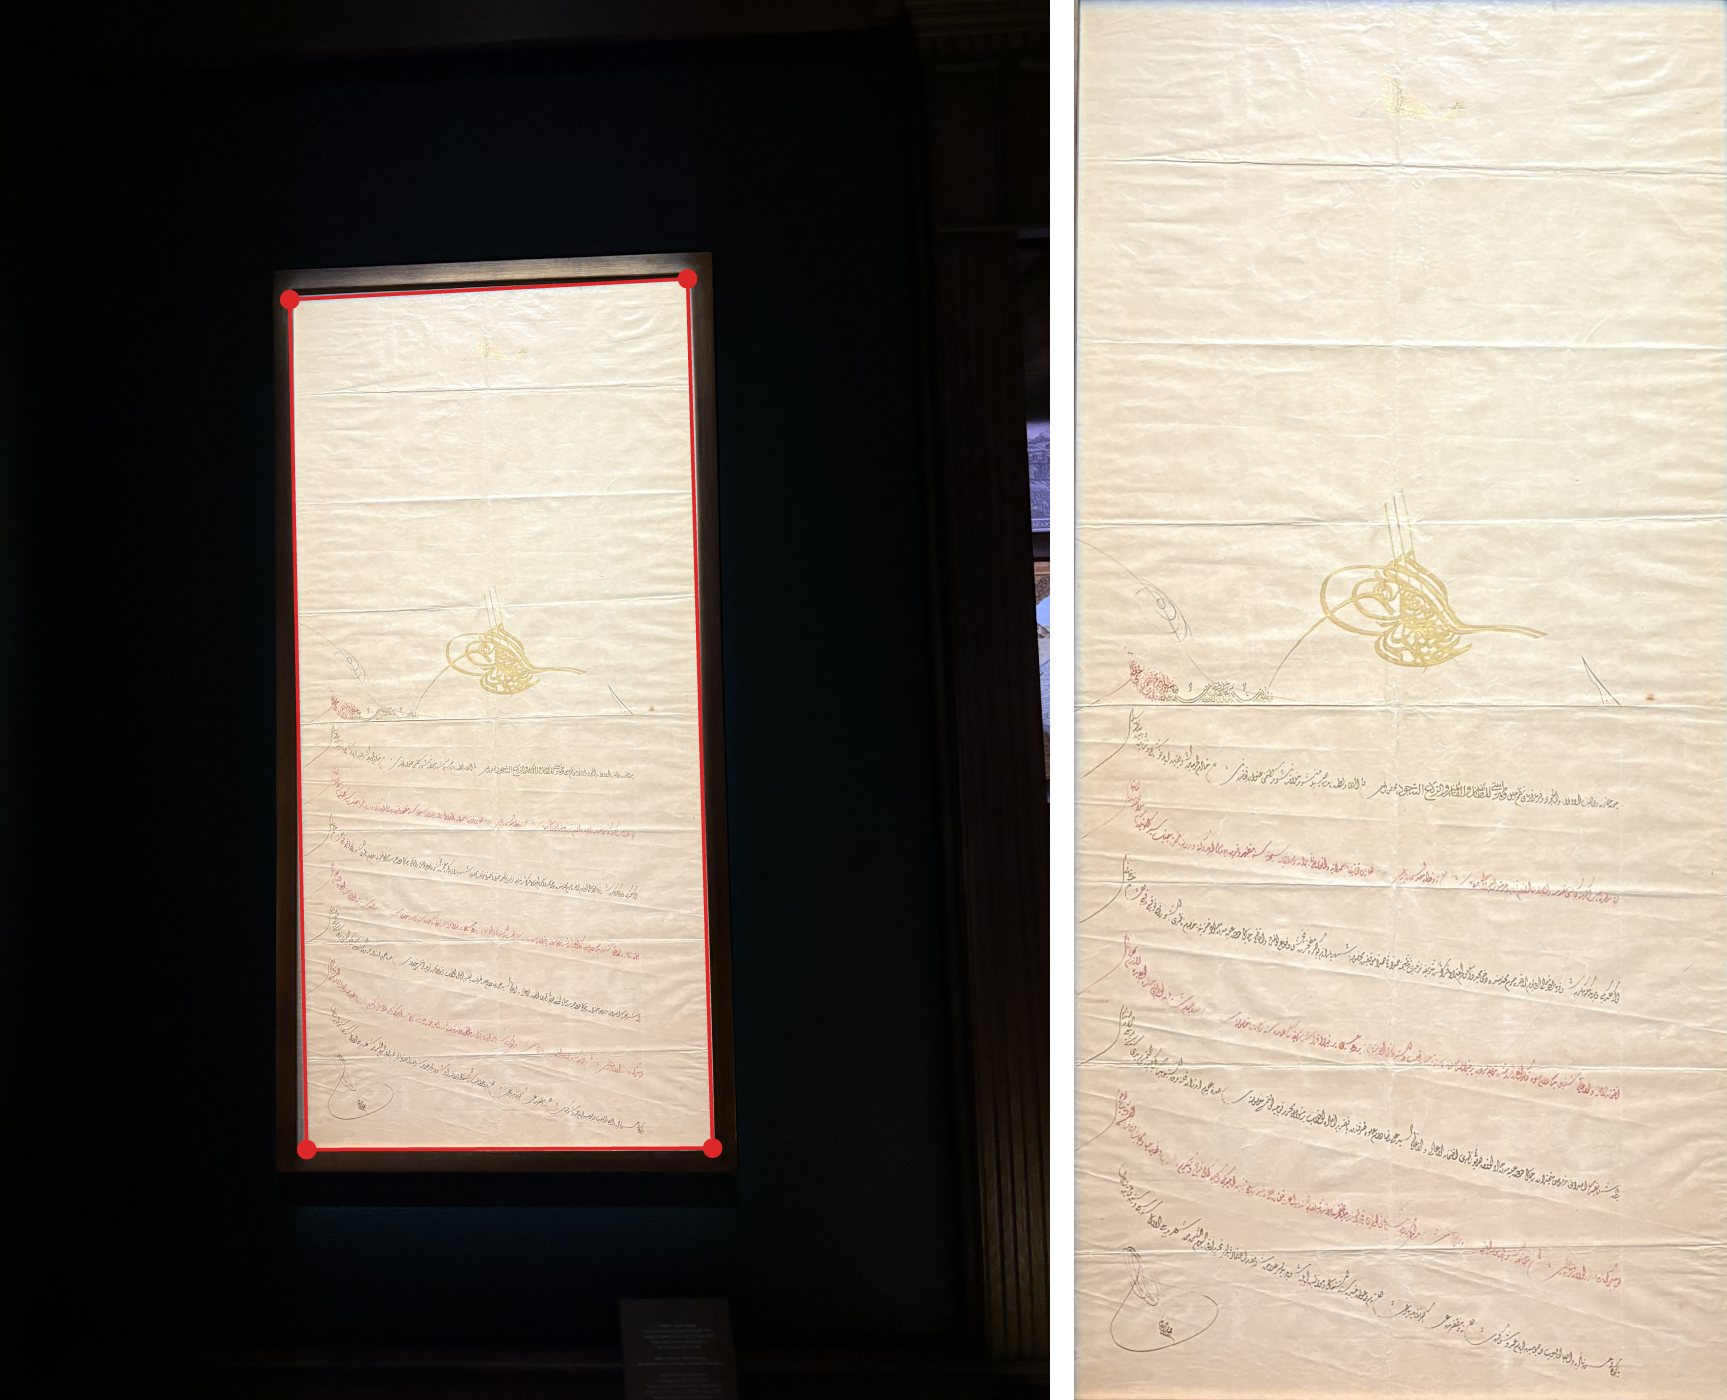
The reference photo, its four corners, and the flattened result.
The layout is right, but in this photo the whole document is only about 1,600 pixels wide. You can follow the lines, but the letters are soft, and in dîvânî one dot or one loop changes the word. Everything after this is about filling that frame with detail from the closer photos.
Step 2: find where every other photo goes
For each of the other photos, the agent had to answer one question: which part of the reference is this, and at what angle? It did that with SIFT features: small, distinctive patches (the end of a stroke, a dot, a crease in the paper) that can be found again in another photo even if it is rotated or scaled. Matching patches between a photo and the reference gives thousands of pairs, and a robust fit (MAGSAC, a cousin of RANSAC) throws out the wrong pairs and keeps a homography: the one perspective transform that maps the photo onto the flat page.
The close-ups are the hard part, because they share little with the small reference. So each photo was tried at several sizes, and the size with the most consistent matches won. Every photo found its place. Drawn on the final image, they look like this:
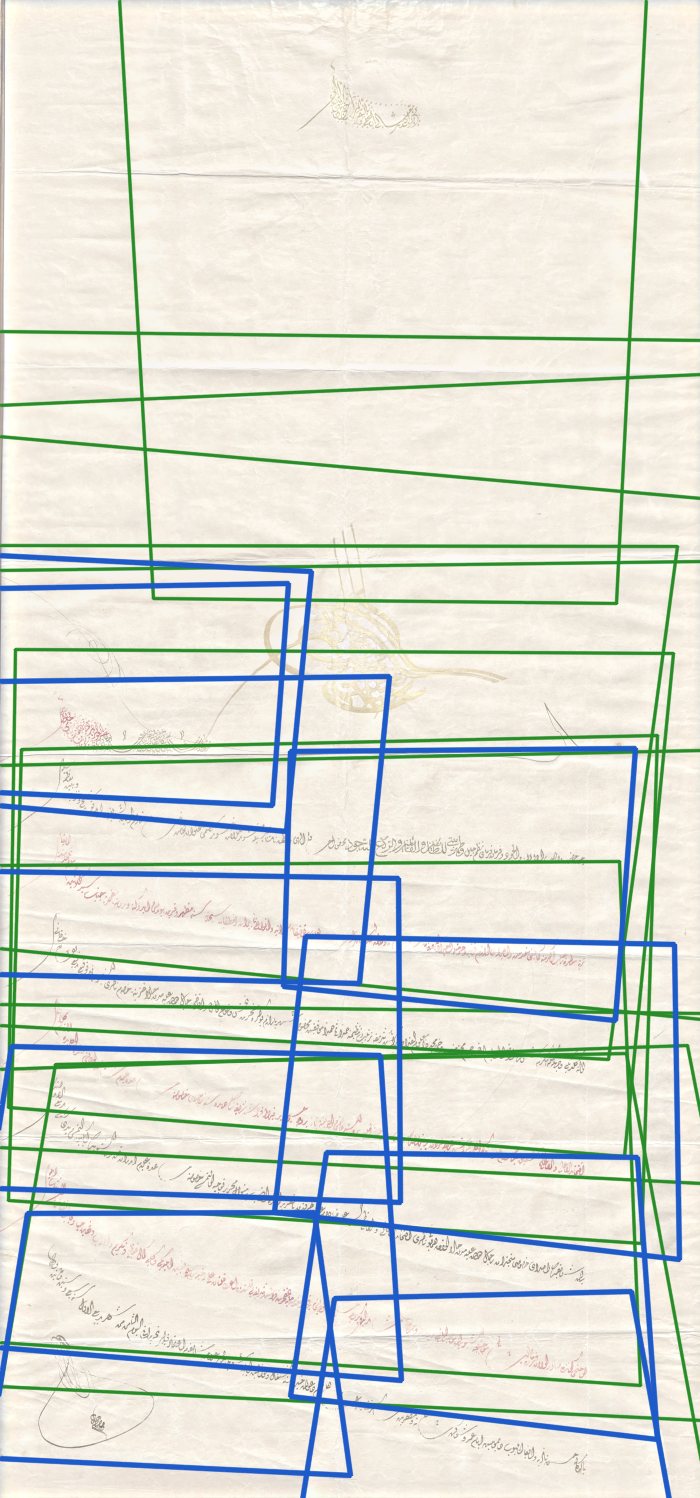
Where each photo landed. Green: shots from a step back. Blue: close-ups.
Step 3: blend, and let the sharpest photo win
A homography assumes the paper is flat, and it is not. After warping, a photo can still be off by a few pixels where the paper bends, which is enough to double every stroke. So each warped photo was nudged once more with dense optical flow against the mosaic built so far: a small correction for every pixel, not one for the whole photo.
Then the blending. Three things decide how much a pixel from a photo counts:
- Resolution. A close-up covers the same patch of paper with many more pixels. Its weight grows with the fourth power of that, so where a close-up exists, it wins outright instead of being averaged with blurrier shots.
- Glare. Light bouncing off the glass shows up as patches brighter than the paper around them. Those are found and down-weighted, so another photo of the same spot takes over.
- Lighting. Each photo’s colour and brightness were matched to the mosaic before it went in, so the seams don’t show as steps.
The straight-on photo goes in last, with a tiny weight, only to fill gaps no other photo covered.
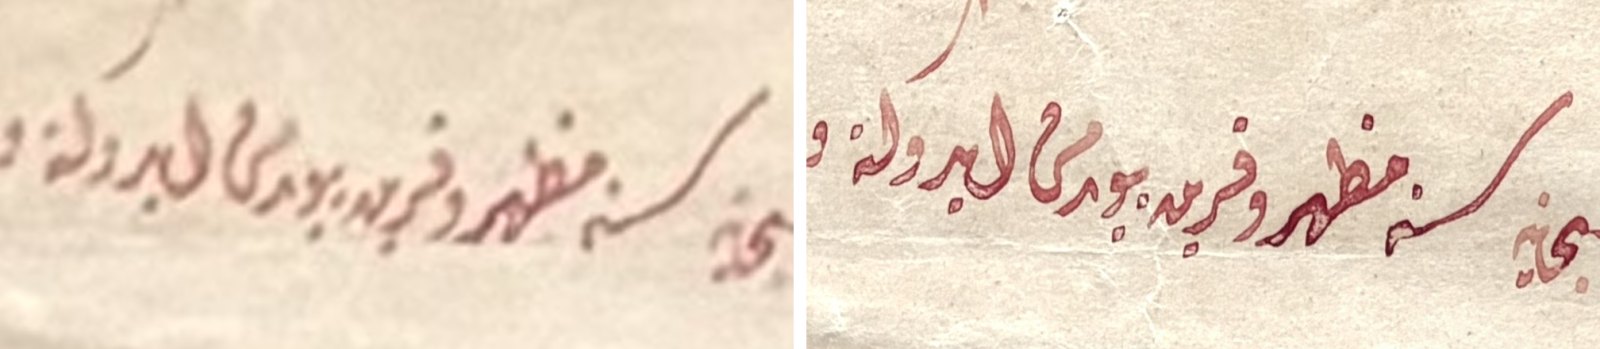
The same patch of the berat. Left: the straight-on photo, enlarged. Right: the stitched replica.
Last, the lamp. The top of the frame was brighter than the bottom, and the frame cast a shadow along one edge. The agent estimated the bare paper colour everywhere (masking out the ink first, so the text doesn’t count as shadow), divided it out, and kept 5 percent of the original variation so the paper still looks like paper and not like a flat fill.
Step 4: the gold
The invocation at the top is written in gold, small and stacked. In the normal photos it nearly disappears into the cream paper. In the side-lit close-ups it is clear, but side light does something awkward to gold: strokes that face the light shine, and strokes that face away turn dark. The same word looks like a different picture in each photo, so SIFT has nothing reliable to match.
Here the agent needed a hand. It drew matching grids over the close-up and the replica, a few landmarks were picked by hand from those grids (this loop, that dot), and the photo was placed from them. Then it refined the fit by block matching, not on the pixels themselves but on maps of “how much gold is here”, which stay the same whether the gold shines or not. The patch was then evened out and feathered into the page.
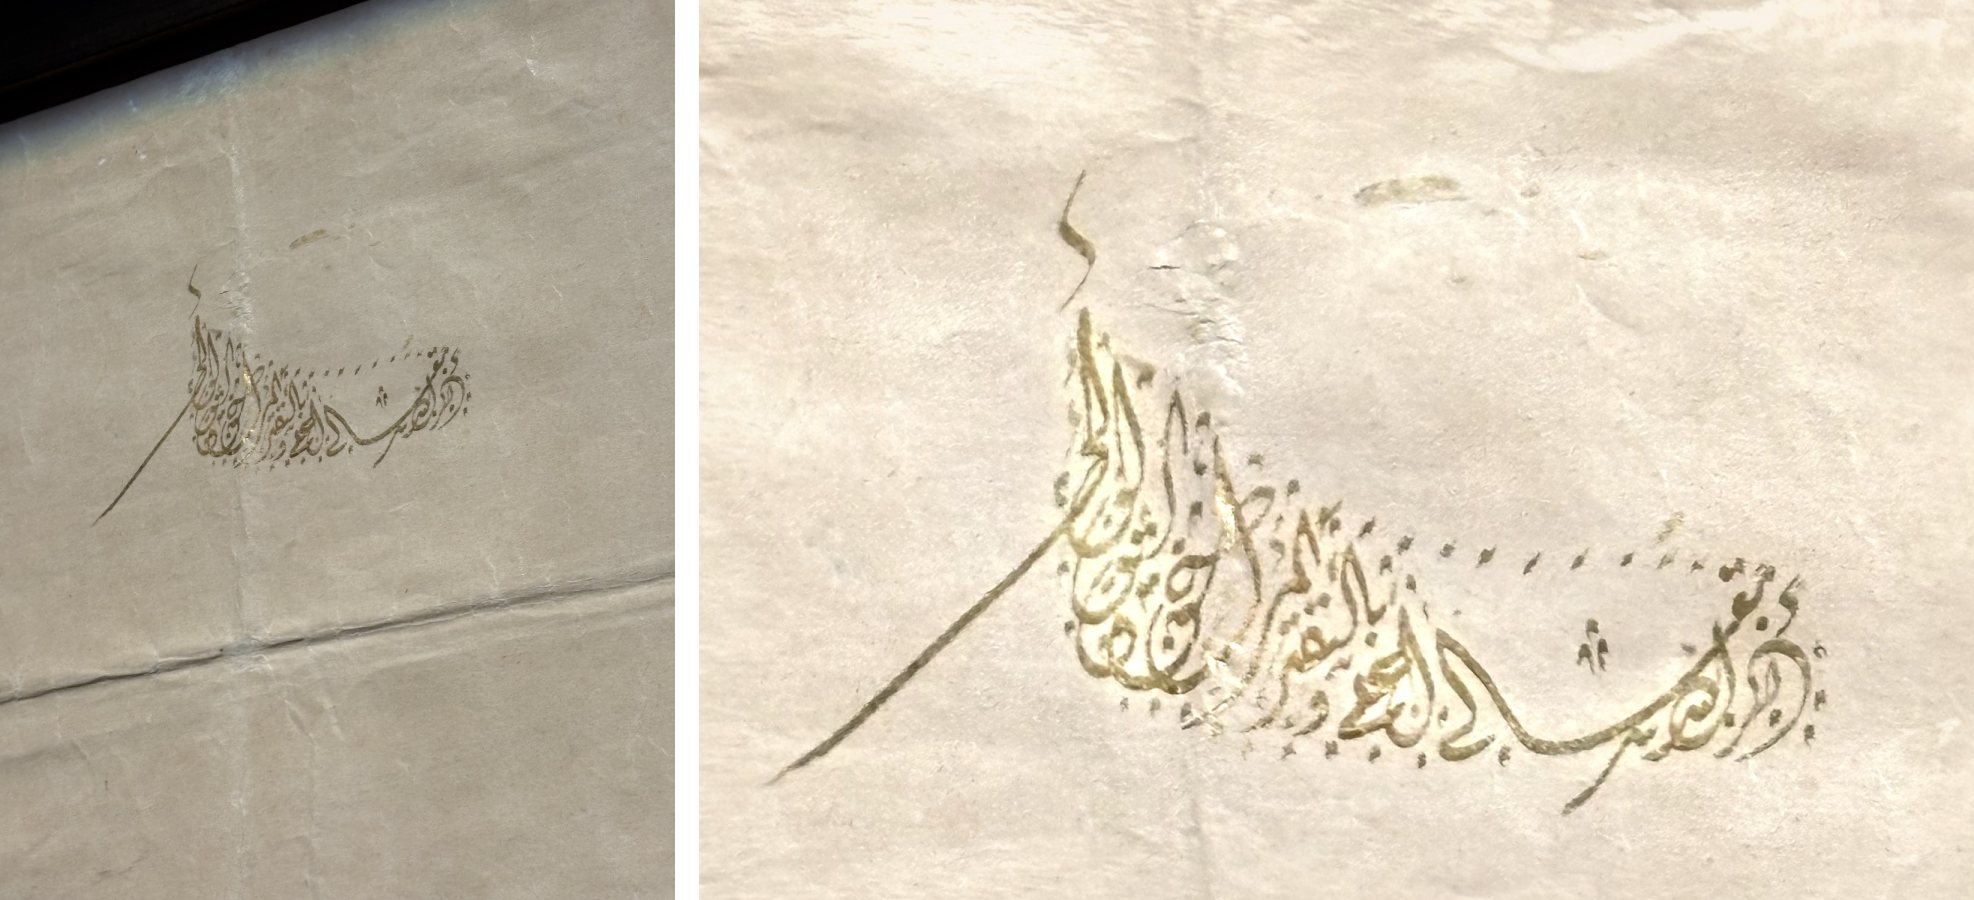
The gold invocation. Left: one of the side-lit close-ups. Right: as it ends up in the replica.
The result
The replica is 8000 × 17131 pixels. In the app it is cut into a Deep Zoom tile pyramid and served from a public Upstash Blob bucket, so the repository stays light and the page loads only the tiles you are looking at.
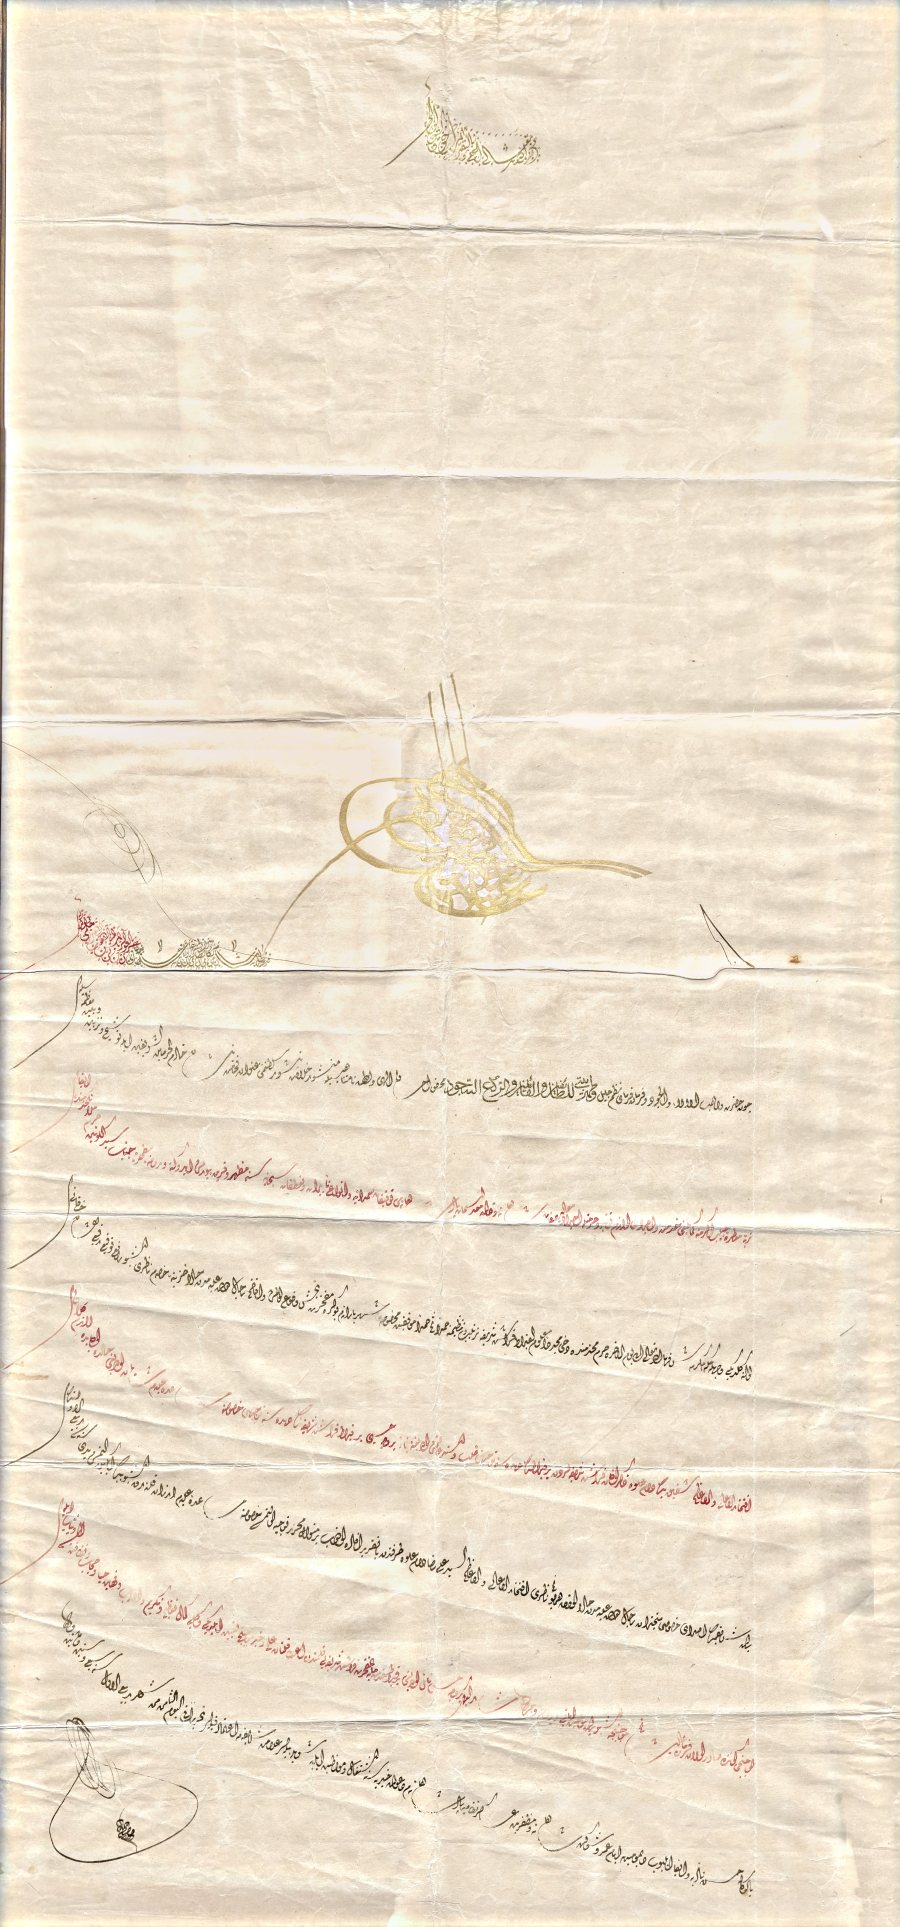
The finished replica, scaled down. The full image is here (20 MB).

It is not a scan. Where I only had a photo from a step back, the detail is softer, and anything I didn’t photograph closely can’t be recovered. But it is sharp enough to argue about single letters on the black lines, which is what the reading needed.
Reading it
The reading was harder than with the map or the obelisk. The berat is in dîvânî, a chancery hand where lines climb steeply to the left and end in stacks of words. Opus 5.5 made the first reading, line by line and then word by word: each line was unrolled into a straight strip, cut into words, read by one subagent and re-read blind by others, with a third settling disagreements from the letter shapes. Fable 5.2 then proofread it phrase by phrase against the replica and fixed a number of words.
It is still provisional. The opening formula, the Qur’anic verse, the closing
and the date are secure; parts of the body are partial, and the app marks how
sure each phrase is. The proofreading notes are in the repository, in
PROOFREAD-REPORT.md.
If you read Ottoman and see something wrong, or want to try a reading with
another model, the full image is linked above and the reading lives in
data.js. Pull
requests are welcome.